How to Caulk a Bathtub (And Make It Look Like You Paid Someone)
Old caulk gets moldy, cracks, and lets water into your walls. Replacing it takes an hour and makes the whole bathroom look cleaner. Here's exactly how.
The caulk line around your bathtub is doing one job: keeping water out of your walls. When it starts cracking, peeling, or turning gray-black with mold, it’s failing at that job. Left long enough, water gets behind the tile, into the subfloor, and you’ve got a problem that costs thousands to fix instead of the ten dollars and hour this repair actually takes.
New caulk also just looks good. It’s one of those bathroom improvements that makes the whole room feel cleaner without repainting or replacing anything.
Why Caulk Fails
Caulk is flexible by design — it has to be, because your tub moves. Every time you fill it with hot water, the material expands slightly. When it cools, it contracts. Over years, that constant movement causes even good caulk to crack and pull away from the surface. Add soap scum, hard water deposits, and the occasional missed spot during cleaning, and the mold sets in fast.
The fix isn’t cleaning the old caulk — it’s removing it completely and starting over. Caulking over old caulk never works. The new layer doesn’t bond to the old one properly, and you’ll be back doing this in six months.
What You’ll Need
- Caulk remover tool (plastic or metal, about $5)
- Utility knife or razor blade scraper
- Needle-nose pliers (useful for pulling strips)
- Rubbing alcohol or isopropyl cleaner
- Clean rags or paper towels
- Painter’s tape (optional but recommended)
- 100% silicone caulk, white or matching color
- Caulk gun
- A cup of water and dish soap
- Latex gloves
On choosing caulk: Use 100% silicone for a bathtub — not latex, not “paintable caulk,” not the all-purpose stuff. Silicone is fully waterproof, stays flexible much longer than latex, and resists mold far better. It can’t be painted over, but you don’t need to paint it. Buy a color that matches your tub. Most bathrooms use bright white.
Look for a product labeled for kitchens and bathrooms with mold/mildew resistance. GE and DAP both make solid products in the $8–$12 range.
Step 1: Remove All the Old Caulk
This is the most time-consuming part and the part most people rush. Don’t.
Score the old caulk. Run a utility knife along both edges of the caulk line — one pass along the tub surface, one along the tile or wall. You’re cutting the bond so the caulk can be peeled away in strips rather than chipped out in pieces.
Pull it out. Use your caulk remover tool or a plastic scraper to pry under the caulk and pull it free. It often comes off in long strips, which is satisfying. Use needle-nose pliers to grab stubborn ends and pull along the seam.
Get the residue. After the bulk is out, there will be a film of old caulk left on both surfaces. A razor blade scraper works well here — hold it at a low angle and scrape carefully along the tub and tile. Don’t gouge the surface. A plastic scraper is safer on softer tubs (fiberglass, acrylic).
Clean the seam thoroughly. This step determines whether the new caulk bonds properly. Wipe the entire seam with rubbing alcohol on a rag. Get into the corners. Let it dry completely — alcohol evaporates fast, usually a few minutes.
Any moisture, soap film, or caulk residue left in the seam will prevent adhesion. Take your time here.
Step 2: Tape the Lines (Optional but Worth It)
Apply painter’s tape along both edges of the seam — one strip on the tub, one on the tile — leaving the gap exposed. This gives you clean, straight lines and makes cleanup much easier, especially if you’re new to caulking.
Keep the tape close to the seam. You want it to be a guide, not a gap-creator.
Step 3: Fill the Tub With Water
This sounds strange, but it’s the right move. Your tub is heaviest when full — it sags slightly into the floor relative to the wall. If you caulk an empty tub and then fill it, the tub pulls away from the fresh caulk and breaks the seal before it’s even cured. Fill the tub with water before you caulk, and the joint will cure in the position it actually needs to hold.
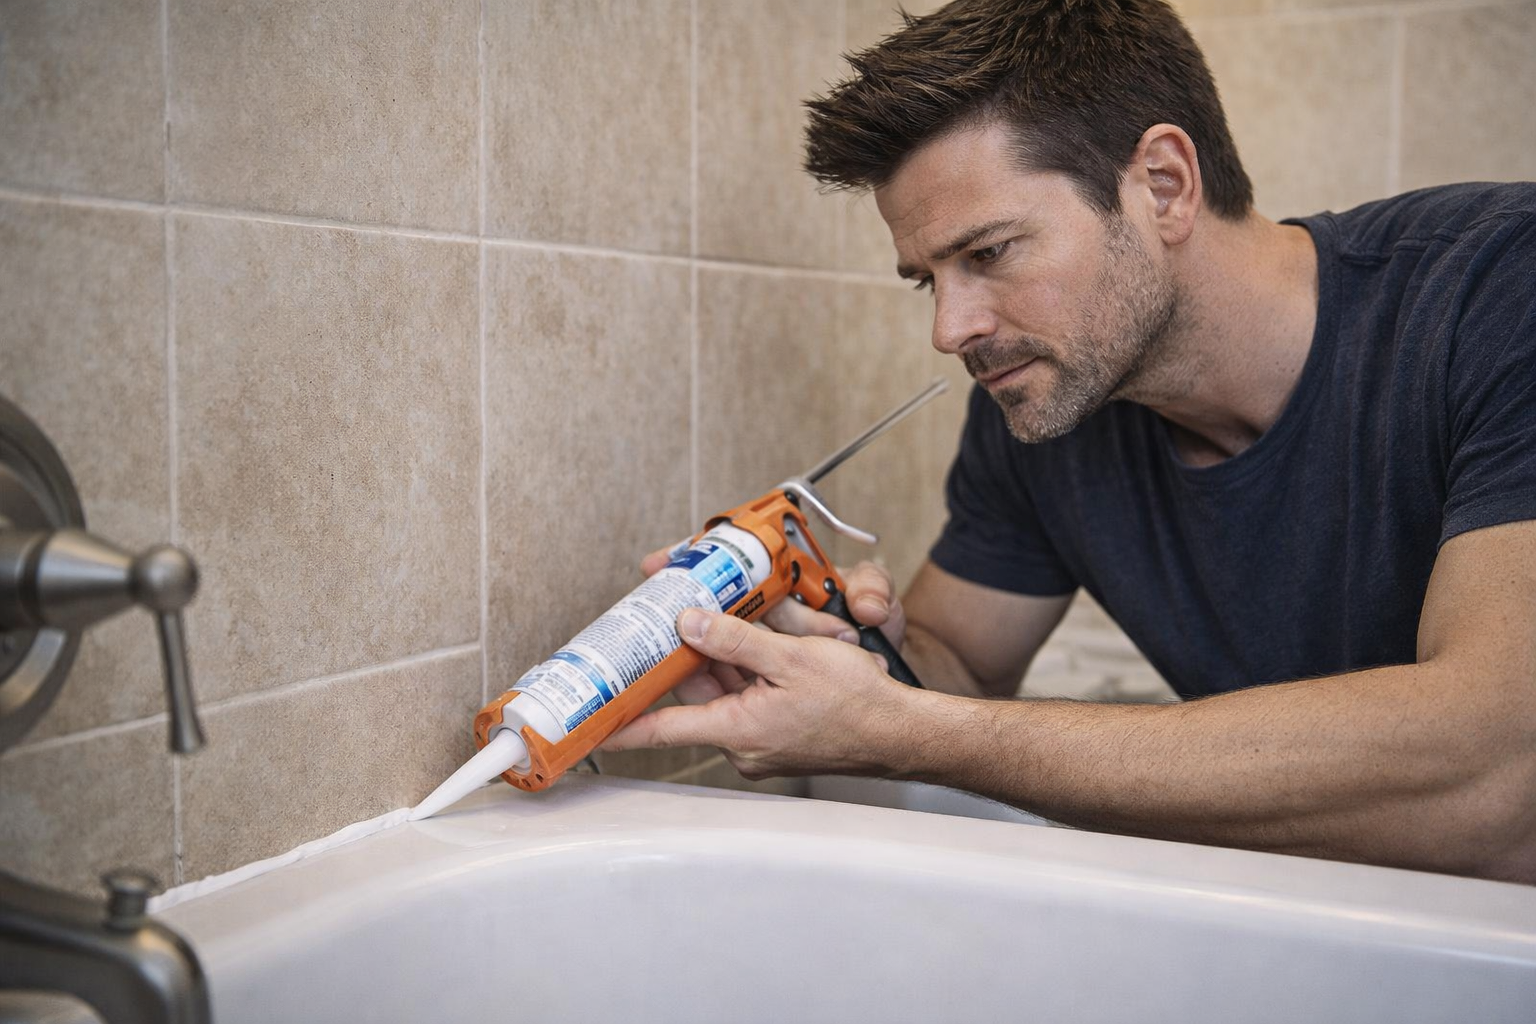
Step 4: Apply the Caulk
Cut the tip. Cut the nozzle at a 45-degree angle. For a bathtub seam, you want a small opening — start with a cut that gives you a bead about 3/16 of an inch. You can always cut more, but you can’t uncut it.
Load the gun and do a test bead. Squeeze a little caulk onto a paper towel first to get the flow going and check the bead size.
Apply in one continuous pass. Hold the gun at a 45-degree angle to the seam, tip pointing in the direction you’re moving. Apply steady pressure and move at a consistent pace. The goal is one smooth bead the full length of the seam without stopping.
Go corner to corner without lifting. If you have to stop, that’s fine — just overlap slightly when you start again and smooth it together.
Step 5: Smooth the Bead
This is what separates a clean-looking job from an amateur one.
Mix dish soap and water in a cup — a few drops of soap in a few ounces of water. Dip your finger in the soapy water. Run your finger along the bead in one smooth pass, pressing lightly into the seam. The soap prevents the silicone from sticking to your finger and lets you slide smoothly along the line.
Don’t go back and forth — one direction, one pass. If there’s a spot that needs more attention, wet your finger again and make another single pass.
Remove the tape immediately while the caulk is still wet, if you used it. Pull at a 45-degree angle back toward the caulk. If you wait until it cures, the tape takes some caulk with it.
Wipe up any squeeze-out with a damp rag right now, while it’s still workable. Cured silicone is very hard to remove cleanly.
Step 6: Let It Cure Before Using the Tub
Most silicone caulk needs 24 hours to cure before exposure to water. Some products say they’re water-ready in 3 hours — check your tube. When in doubt, wait a full day.
Drain the tub after the caulk is applied so it dries in the correct position.
Troubleshooting
Caulk won’t stick: The surface wasn’t clean or dry enough. Silicone will not bond to soap film or moisture. Remove the failed caulk, clean again with fresh alcohol, and let it dry longer before reapplying.
Bead is lumpy or uneven: Smooth it immediately with a soapy finger before it skins over. If it’s already cured, a sharp razor blade can shave down high spots.
It’s pulling away after a few weeks: Either the tub was empty when you caulked it (fill it first next time) or you caulked over old caulk and it didn’t bond. Strip and redo.
Mold came back fast: This is usually a ventilation issue, not a caulk issue. Make sure your bathroom fan is running during and after showers. Silicone resists mold well, but no caulk survives a consistently wet, poorly-vented bathroom indefinitely.
Total Cost and Time
- Cost: $10–$20 (caulk, tape, scraper if needed)
- Time: 1 hour, plus 24 hours cure time
The job looks like a lot of steps but the active work is maybe 45 minutes. Once the old caulk is out and the surface is clean, the rest goes fast. And when it’s done — fresh white bead, clean lines, no mold — it’s one of the most noticeable small improvements you can make in a bathroom without touching anything else.

Written by
Chris Bysocki
Dad of two (a 6-year-old daughter and a 3-year-old son), homeowner, and guy who learns most things the hard way. Writing about parenting, tools, yard work, and gear from a neighborhood in the real world.
More in this category
Ask Chris
Got a question about this topic — or anything dad-related? Send it over. I read every one.